How to get started with AVE on Mac.
Install AVE, import footage or create motion graphics, edit a transcript, try Ask and Plan, and export locally. A practical guide to the Mac editor.
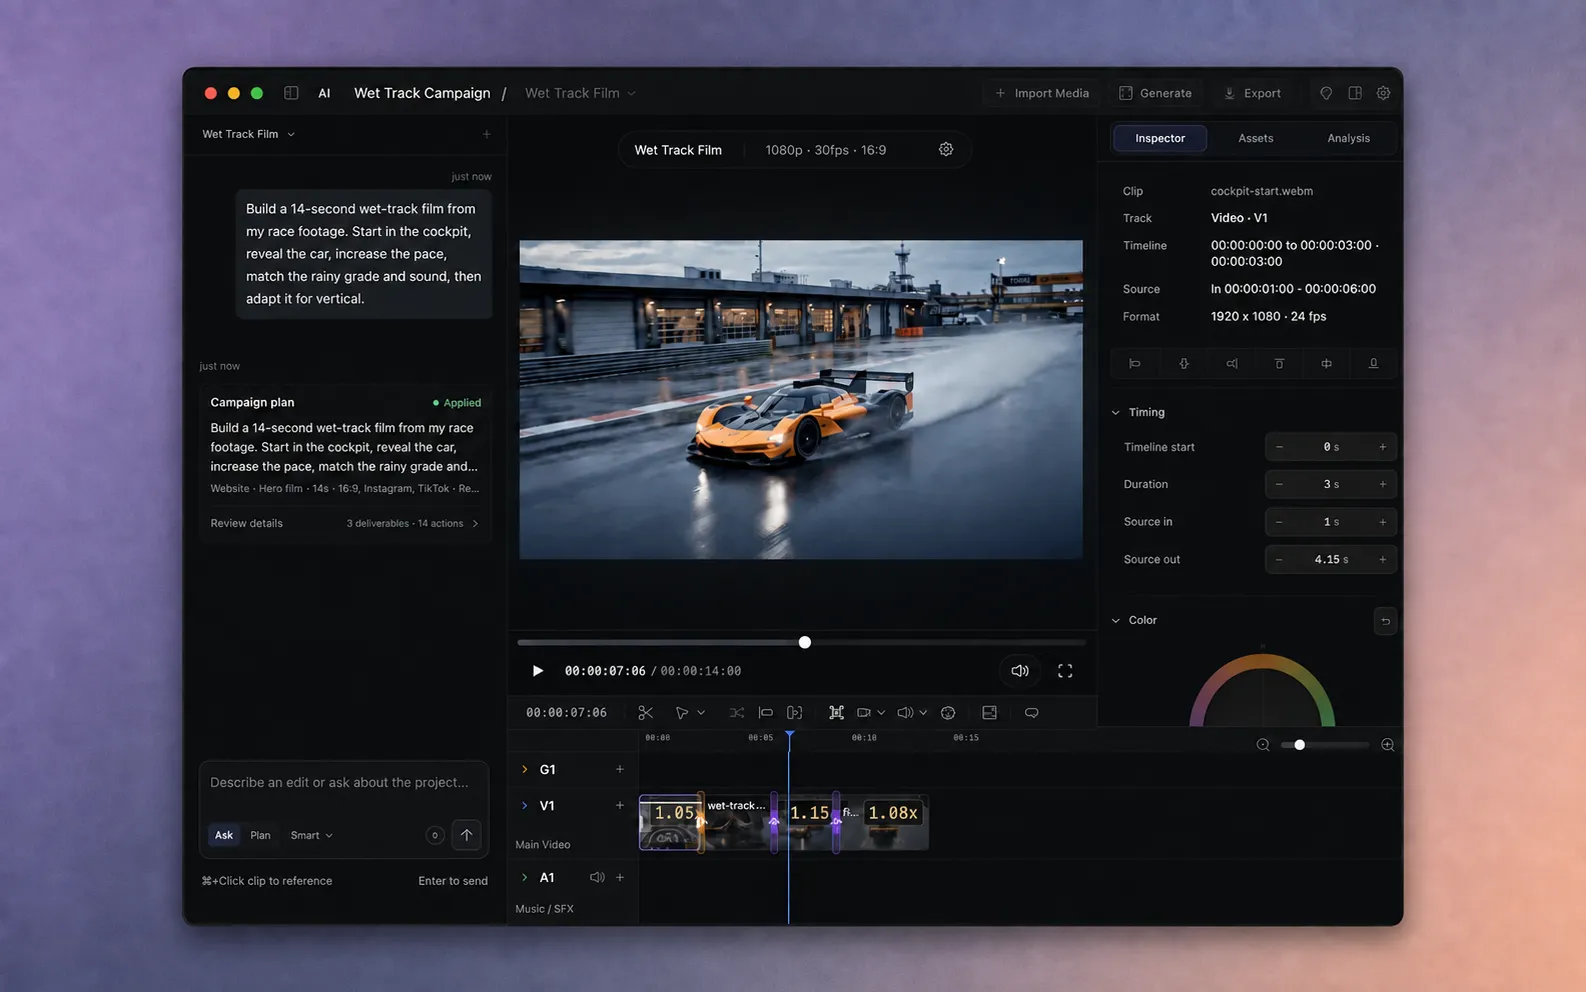
Install AVE on your Mac.
Start with a few video clips you know well. This guide takes you through one small project before you try a longer recording or a full campaign.
- Check your Mac. AVE 1.2.15 requires Apple Silicon, M1 or later and macOS 14.0 or later.
- Download AVE. Open the DMG, drag AVE into Applications, then launch it from Applications.
- Start with the included local tools. The release includes the Local AI engine and starter analysis models. You do not need a generation-provider account just to import and edit your own footage.
AVE Free includes unlimited manual projects and local export without a watermark. Start the seven-day Pro trial in the app for transcription, text-driven edits, and AI tools. No card is required and the trial does not bill automatically; see the Free and Pro breakdown. Already bought Pro? Follow the activation guide.
Create your first project.
A project holds your media and editing work. A sequence is a particular timeline inside it, with its own format and duration.
- Choose New Project from AVE’s sidebar.
- Enter a Project Name and a name for the First Sequence.
- Choose the Aspect Ratio, Frame Rate, and Resolution. Start with 16:9 for a horizontal video or 9:16 for a vertical one. Match the frame rate to your footage when practical.
- Set Duration (sec) for the sequence, then choose Create Project.
You can adjust sequence settings later. For a first exercise, a short sequence with three or four clips is easier to review than an entire media library.
Bring in footage you already have.
- Choose Import Media in the editor’s top bar.
- Choose files or drop them into the import area. The dialog accepts video, audio, and image files; MP4 or MOV video is a useful starting point.
- Optionally choose a project folder in the import dialog to organize your video clips.
- Find the imported media in Assets. Check that the expected clips are present before asking AVE to use them.
Importing a clip and understanding its content are different steps. Speech and visual search depend on the relevant analysis being available. If a plan needs missing analysis, AVE can show an Analyze & Update action.
AVE keeps a project copy. Imported media is copied into the project folder; keep that folder available while editing. Originals outside the project stay in place. You can edit locally without uploading footage to AVE. Optional cloud AI services need an internet connection; see what stays on your Mac before connecting one.
Record new footage directly in AVE.
On macOS 15 or later, choose Record from Home or the editor. Allow screen recording access, choose Screen, Window, or Area, then set the background and frame. Add microphone, camera, or system audio if you need them, and choose the aspect ratio and countdown before starting.
Choose Stop to save the take. AVE adds it to Assets and selects it on the timeline. Select the recording clip to refine backgrounds, camera, cursor, zooms, and audio in Inspector. Recording is included in the seven-day Pro trial and requires AVE Pro afterward. Saved recordings remain editable and exportable; see the screen recording guide for the full workflow and permission help. AVE editing still supports macOS 14.
Create motion graphics from a brief.
You can start without footage, or add animation to an existing edit. Choose Motion graphics in the header, describe an animated video, title, or overlay, and use your configured assistant to create a preview.
Review playback, refine the brief, or open Customize to change exposed text and colors. Choose Video or Graphics under Place on, then select Add to timeline. Read the complete motion graphics guide for assistant setup, duration, editing, and export.
Edit a recording by its words.
For a spoken recording, open a project and use Import Media to add your audio or video. Start the Pro trial if needed, then let AVE transcribe it locally. No external assistant account is needed.
- Open Transcript in the right panel. Source shows the original recording; Sequence follows the clips on your selected dialogue track.
- In Sequence, drag across words or hold Shift to extend the selection. Use Preview to listen before making a change.
- Choose Split to cut at the selection’s edges while keeping the footage. Choose Delete to remove the passage and close the gap. Neither action deletes the original media file.
- Choose Create sequence to turn a useful passage into a separate sequence while keeping the original sequence intact.
- Open Review cleanup. Set the minimum pause, preview suggestions, and check the filler words or pauses you want to remove. Apply the selection together, or close the review without changing the timeline.
- Optionally choose Captions, then play through the joins and refine on the timeline. Use Undo if a cut removes too much.
Split keeps the selected passage; Delete removes it. These are timeline operations, not clipboard Cut and Paste. Without word timing, AVE offers segment-level selection. Locked tracks or unsupported overlapping layers can block an edit to keep the sequence synchronized.
If cleanup finds no candidates, there may be no eligible pauses at that threshold or timed filler words. Lower the pause threshold to review shorter gaps. Nothing is removed until you apply selected cuts.
Choose Ask or Plan.
The composer at the bottom of the assistant panel has two modes. Choose the one that matches how much you want to review before a change happens.
Ask: questions and focused actions
Use Ask to understand the project, find footage, or request a supported direct edit. It is not a read-only mode: a clear, supported action can change the timeline. Use Plan when you want a preview of a broader edit first.
Start with Smart, which uses AVE’s built-in tools when they match your request and asks the assistant when needed. Reason lets the assistant interpret your request first. Both work with AVE’s supported editing tools.
Plan: an edit you can inspect before approving
Select Plan and describe your intended result: the source footage, approximate length, order, and anything that must stay untouched. Start with one deliverable.
Plan a 20-second horizontal cut from these clips. Start with a wide shot, follow with two close-ups, and end on the clearest final shot. Keep the original sound. Do not generate new footage.
Adapt the example to the shots you have, then review the suggested choices. Press Enter to send; use Shift + Enter for a new line.
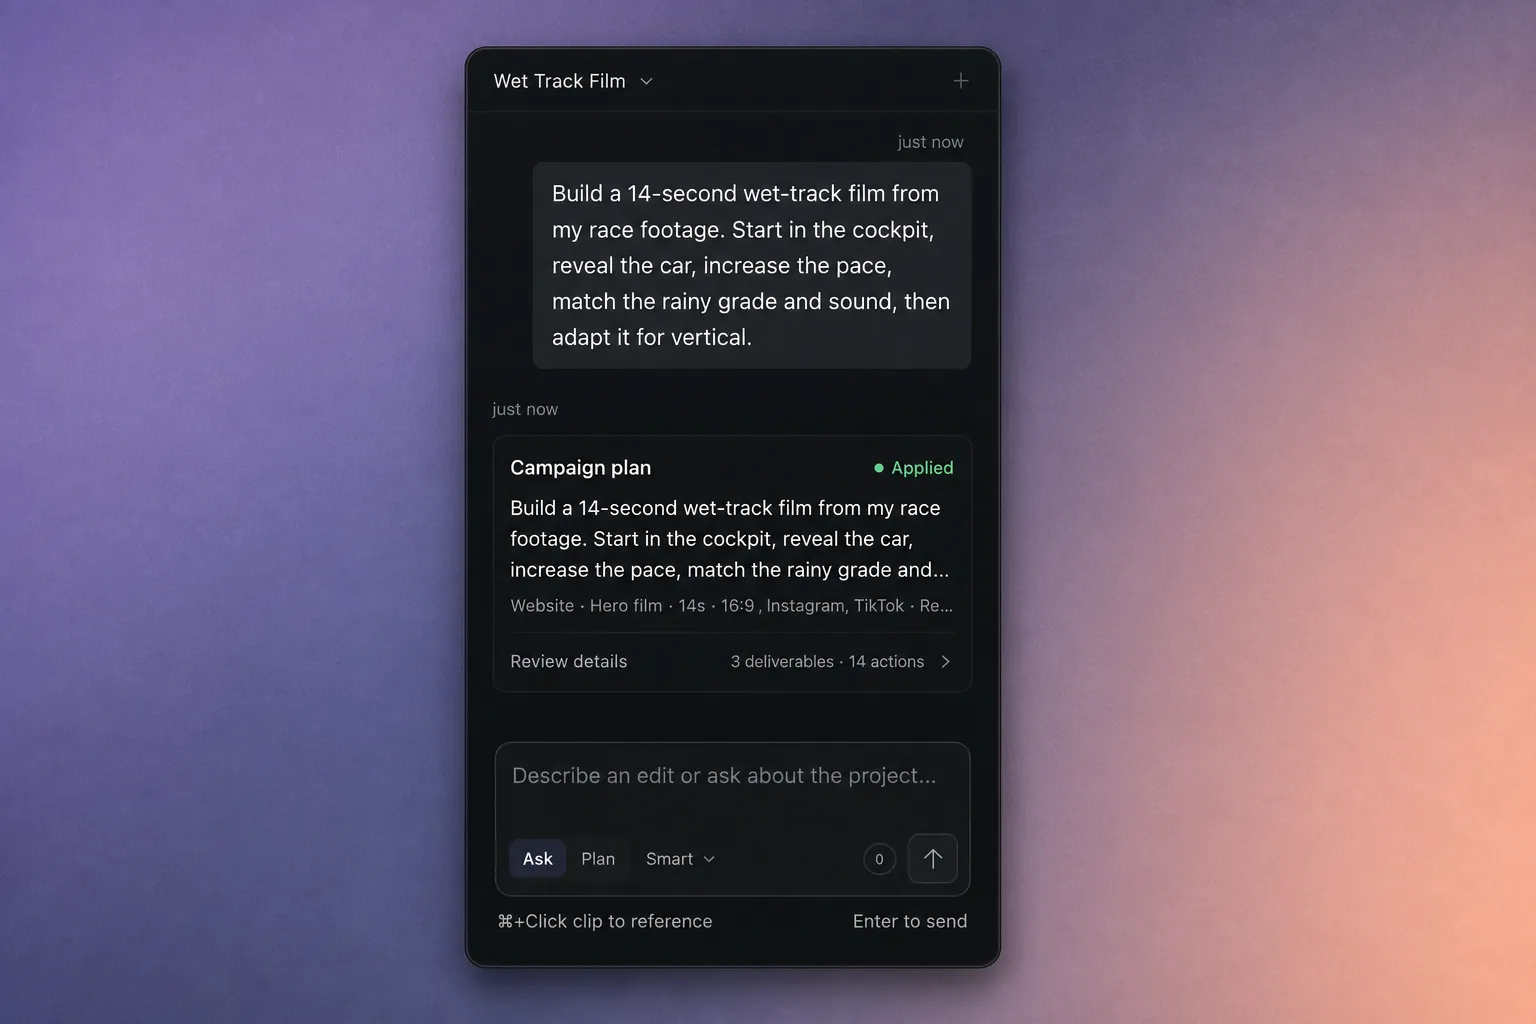
Review before you approve.
- Open Review details on the plan card. Check the proposed sources, sequence, steps, and actions.
- If AVE requests analysis, use Analyze & Update, then read the updated plan. If it asks for clarification, answer before continuing.
- Revise or cancel anything that does not match your brief. When you are happy with an edit plan, choose Approve Plan. A campaign card uses Approve Campaign.
- Wait for AVE to finish applying the plan. Check its status for any steps that need your attention.
Play through the result in the viewer. Check the beginning, every cut, and the ending. Listen to the audio rather than judging the edit from thumbnails alone.
Keep the parts that work. Refine the rest.
The output remains an editable timeline. Select a clip to inspect its timing and available controls, or ask for a small, concrete change instead of rewriting the entire brief.
Shorten the selected clip to 3 seconds. Keep the rest of the sequence unchanged.
Use ⌘ + click on a timeline clip to reference it in the composer. Confirm the reference before sending a clip-specific request. You can also trim or adjust the clip manually in the timeline and Inspector.
When making a vertical version, check each shot and adjust the framing to keep faces, titles, and important details in view.
Export locally or continue in Final Cut Pro.
- Make sure the intended sequence is active, then choose Export in the top bar.
- For a standard video file, select MP4 - H.264. MOV - ProRes 422 is another available video format when you need a larger master file. Manual export remains available after the trial.
- For an editable handoff, choose Export FCPXML. Select plain subtitles or editable titles for captions, and include source media when you want a self-contained handoff folder.
- Check the output resolution, frame rate, duration, and any preflight warnings. Resolve missing media or unintended gaps before rendering.
- Start the export and wait for a completed result. AVE saves rendered files in the project’s Project Exports folder.
- Open the finished file and check its picture and sound outside the editor.
FCPXML is an editable timeline handoff, not a rendered video. AVE carries your cuts, audio levels, supported still images, and chosen caption format into Final Cut Pro. AVE lists unsupported effects or graphics before export, and some AVE-specific finishing may require adjustment after import. Follow the complete Final Cut Pro handoff guide for the full workflow.
Manage your project files.
Use Projects, Assets, and Exports on Home to move unwanted project-owned files to macOS Trash. Review the confirmation before continuing. Moving a whole project also moves its media and exports; imported originals outside its folder stay in place.
In the editor, Remove from Project removes an asset and its timeline clips while keeping files on disk. Move to Trash also removes the project-owned files. Read the file-management guide for cross-project reuse, recovery, and existing projects.
If something does not look right.
AVE cannot find the moment I mean
Check that the source was imported and the required speech or visual analysis is available. Try a concrete quote, object, action, or scene description. Preview the returned source before using it. Our footage-search article explains how different evidence helps.
The assistant misunderstood my edit
Make the request smaller and name what must remain unchanged. Reference the relevant clip. Use Plan if you need to inspect the sequence of actions before execution. Model quality and the available source context affect results.
A feature asks for Pro or another model
Check the current Free and Pro limits and your available models in Local AI settings. Optional providers and external assistants have their own setup and costs. If you connect a cloud service, its requests are processed outside your Mac.
I want to use Claude Code or Codex
That is optional. Follow the AVE MCP setup guide and connect the client in Settings > Connections. Review the access scopes you enable.
Export fails or the rendered file differs
Read the exact error, confirm that the source files are still available, and check the active sequence and export settings. Send your AVE version, Mac/macOS details, the error, and a short reproduction to support@tinythings.app. Do not include private client footage unless it is necessary and you have permission.