How to use an installed CLI assistant with AVE.
Choose Codex CLI, Claude CLI, or Qwen CLI as AVE’s assistant, confirm the local installation, and send a first request from the AVE composer.
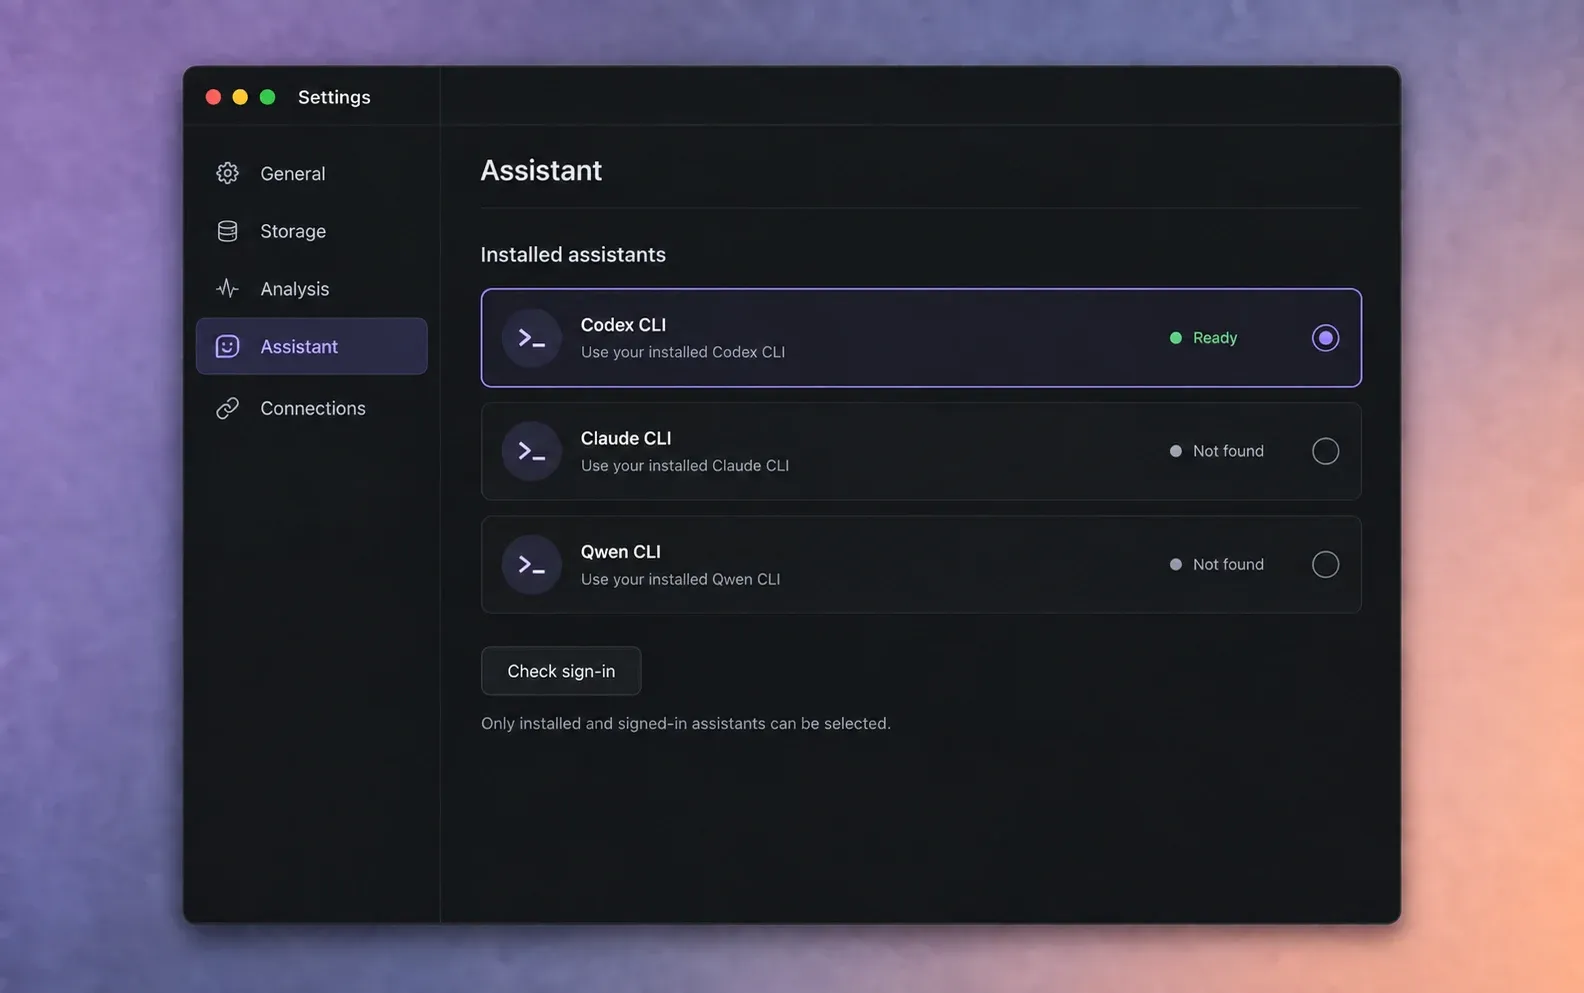
Choose the right assistant path.
This guide covers an installed CLI used inside AVE. AVE 1.2.2 can use Codex CLI, Claude CLI, or Qwen CLI for assistant reasoning. You still write the request in AVE’s composer, and AVE supplies project context and editor tools.
This is separate from AVE MCP. External MCP lets you work from Codex CLI or Claude Code outside the AVE window. Qwen CLI is available as an installed assistant inside AVE, but it is not currently an external AVE MCP client.
Simple rule: if you want to type in AVE, use this guide. If you want to type in Codex or Claude Code and control AVE from there, use the MCP setup guide.
Install and sign in to the CLI.
Install the assistant using its official instructions, then complete its normal sign-in or account setup. AVE detects the local executable and checks whether it is ready to accept a request.
- Ready means AVE found the CLI and confirmed its sign-in state.
- Available means AVE found the CLI but could not fully verify authentication.
- Sign-in required means the CLI is installed but needs account setup.
- Not found means AVE could not locate the CLI executable on this Mac.
Open the CLI once in Terminal if its own setup requires an interactive sign-in. Do not paste provider credentials into an AVE project or assistant prompt.
Open Assistant settings.
- Open AVE and choose Settings.
- Select Assistant.
- Find Installed assistants.
- Choose Check sign-in after installing or signing in to a CLI.
The list shows Codex CLI, Claude CLI, and Qwen CLI separately. One assistant can be ready while another is not installed.
Choose a CLI assistant.
- Select the ready CLI you want AVE to use.
- Choose a known model, the provider default, or a custom model ID when that provider supports it.
- Choose a reasoning level when the selected provider offers that control.
- Close Settings and return to the editor.
Provider models and account limits can change independently of AVE. If a selected model is unavailable to your account, choose the provider default or another model your CLI can use.
Send a first request from AVE.
Use Ask for project questions, footage search, or a focused supported action. Use Plan when you want to inspect a broader set of editing steps before applying them.
Inspect the analyzed footage in this project. Find the strongest wide opening shot and two close details. Show me the source moments first. Do not change the timeline yet.
If the results match your footage, follow with a small edit request. Name the target sequence, approximate duration, source constraints, and anything AVE must not change.
Understand the privacy boundary.
The CLI process runs on your Mac, but the provider may send prompt text and compact project context to its own service. That handling follows the provider account and CLI you selected.
AVE’s source media remains in the local project workflow. AVE gives the assistant structured context and keeps supported timeline execution in the editor. Review AVE privacy and the provider’s own terms before using confidential client work.
AVE 1.2.6 discovers models from your installed CLI. If the model menu is older than your provider’s current choices, update that CLI, reopen its model selector, and confirm the installation in AVE. Reconnecting an already authenticated assistant is usually unnecessary. You can also use the same assistant in the motion graphics composer.
If AVE cannot use the CLI.
The CLI is not found
Confirm that the CLI runs from Terminal under the same macOS user, then return to Assistant settings and choose Check sign-in. Restart AVE if the CLI was installed while AVE was open.
Sign-in is required
Open the CLI directly and complete its own sign-in. Then check again inside AVE. AVE does not complete the provider’s interactive account flow for you.
The request times out or the model fails
Retry a smaller request, check the provider CLI directly, or choose another ready provider or model in Settings. The provider’s availability and account limits can affect the result.
See the full troubleshooting guide for a step-by-step diagnosis. If AVE still reports the wrong local status, send the displayed status and a support report to support@tinythings.app.