How to import and analyze footage in AVE.
Add video, audio, or images to an AVE project, run the right local analysis, and confirm that the footage is ready for search and assisted editing.
Prepare the analysis tools first.
Open Settings > Analysis and confirm that the capabilities you need report Ready. Visual Understanding describes video frames. Transcription creates timed speech context from video or audio.
If either capability still needs setup, follow the on-device analysis guide before importing a large batch.
Import your media.
- Open an existing AVE project or create a new one.
- Choose Import Media in the editor’s top bar.
- Select video, audio, or image files, or drop them into the import area.
- Optionally choose a project folder so related recordings stay organized in Assets.
- Confirm that every expected item appears in Assets.
Importing does not copy meaning into the project. It makes the source available. Analysis is the next step that creates searchable speech and visual evidence.
Keep the sources where AVE can reach them. Moving, renaming, disconnecting, or deleting source media can leave the project with missing files. Use AVE’s relink workflow if a source moves.
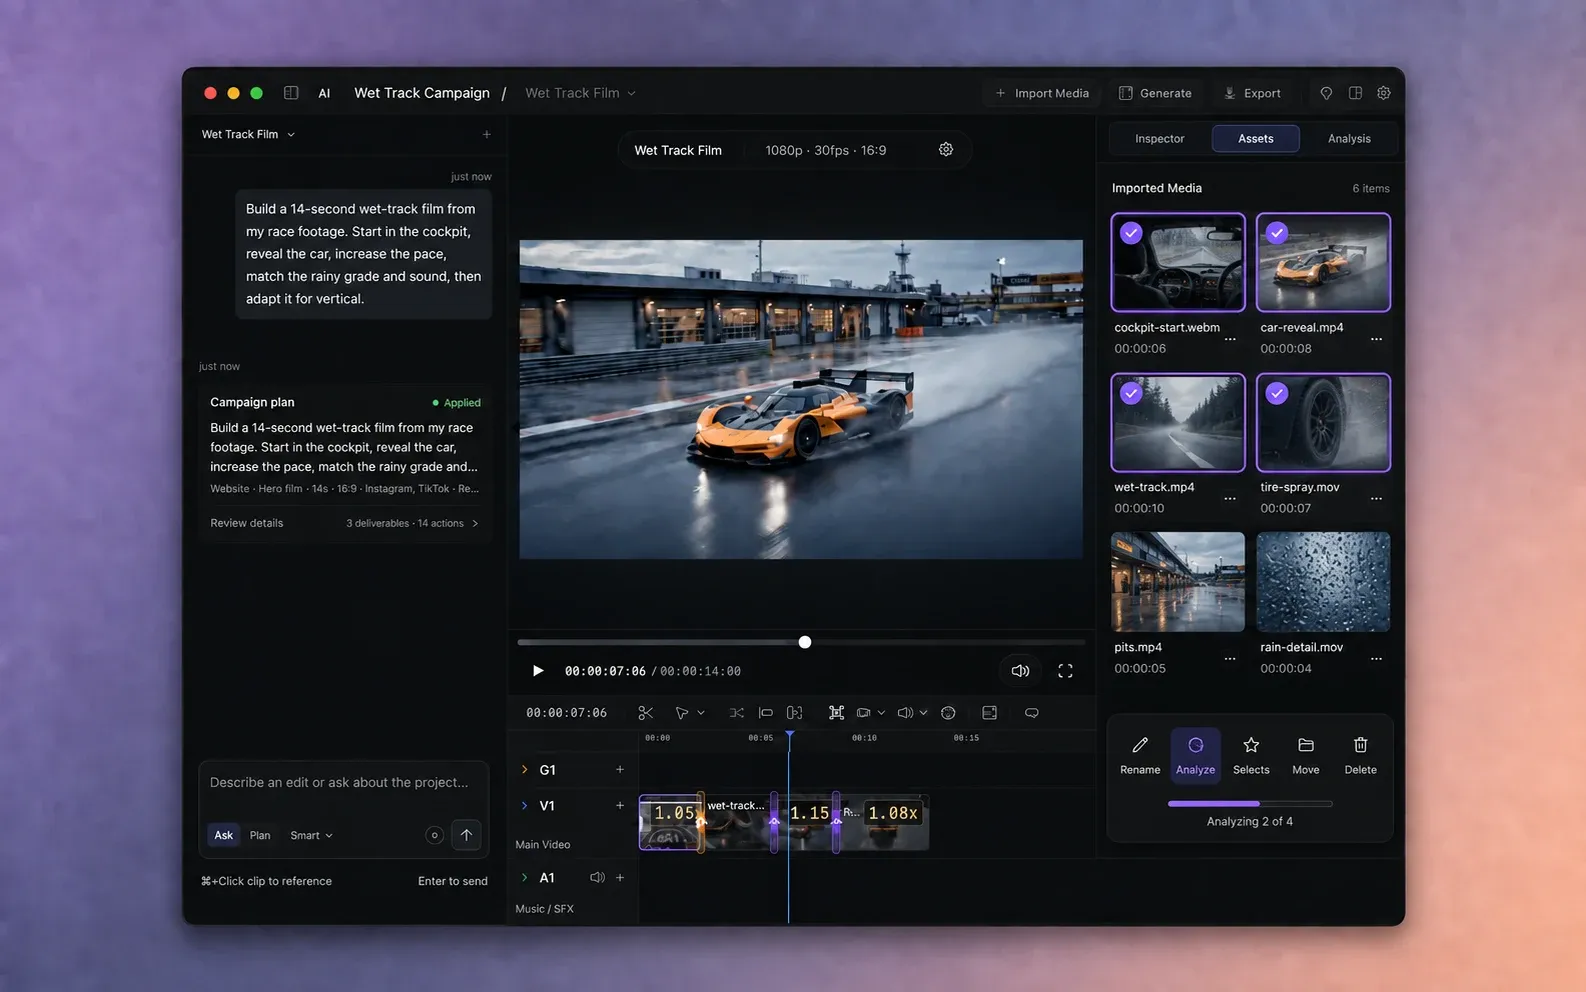
Select the footage you want to analyze.
- Open the Assets panel.
- Select one clip, or select several clips for a batch.
- Use the multi-asset action bar and choose Analyze.
You can start with the clips needed for the current edit. AVE can queue several selected assets, but analyzing a focused set gets you to a useful result sooner.
Run the analysis that fits the media.
For video with visible scenes and dialogue, use both Visual Understanding and Transcription. For silent b-roll, Visual Understanding is the useful part. For an audio-only interview, Transcription is the useful part.
An assistant plan can also request missing analysis. When a plan shows Analyze & Update, review what AVE needs, run the analysis, then read the updated plan before approval.
Let analysis finish.
AVE shows the active asset and queued work while analysis runs. The time varies with source duration, model choice, and your Mac. A longer recording or a larger batch can take several minutes.
- Keep AVE open while the requested analysis is active.
- Do not move the source file during processing.
- You can continue organizing the project while other assets wait in the queue.
Verify the results.
- Open a speaking clip and confirm that its transcript contains timed words.
- Search for a visible action, object, place, or scene that you know is in the footage.
- Preview a returned moment before placing it on the timeline.
- If the result is too broad, add concrete visual or spoken details to the search.
Search results are candidates backed by the analysis AVE has. Previewing the source remains important, especially when several clips contain similar scenes.
Use analyzed footage in an edit.
You can now search Assets or Moments, edit a recording by its transcript, run Batch Selects, or ask the assistant to find source ranges for a plan.
Find the moment where the speaker explains the main problem, then show me two nearby visual cutaway options. Do not change the timeline yet.
Begin with a read-only search request like this. Preview the results, then ask AVE to use the selected source in a small edit.
If analysis stalls or the results look empty.
The asset stays queued
Check the status bar for another active asset. A selected batch is processed as a queue. If nothing is active, open Settings > Analysis and verify that the required capability is ready.
There is no transcript
Confirm that the source contains audible speech and that Transcription was enabled. Images and graphics cannot be transcribed. Re-analyze the clip after fixing the transcription setup.
Visual search returns no useful moment
Confirm that visual analysis completed, then search with a concrete description such as an object, action, camera framing, environment, or color. Use speech search for exact spoken language.
Use the full troubleshooting guide for engine, model, queue, CLI, and MCP checks. If a repeatable file still fails, send the exact error and a support report to support@tinythings.app.