How to export an AVE timeline to Final Cut Pro.
Export an editable FCPXML timeline from AVE to Final Cut Pro with supported clips, gaps, audio levels, captions, still images, and source media.
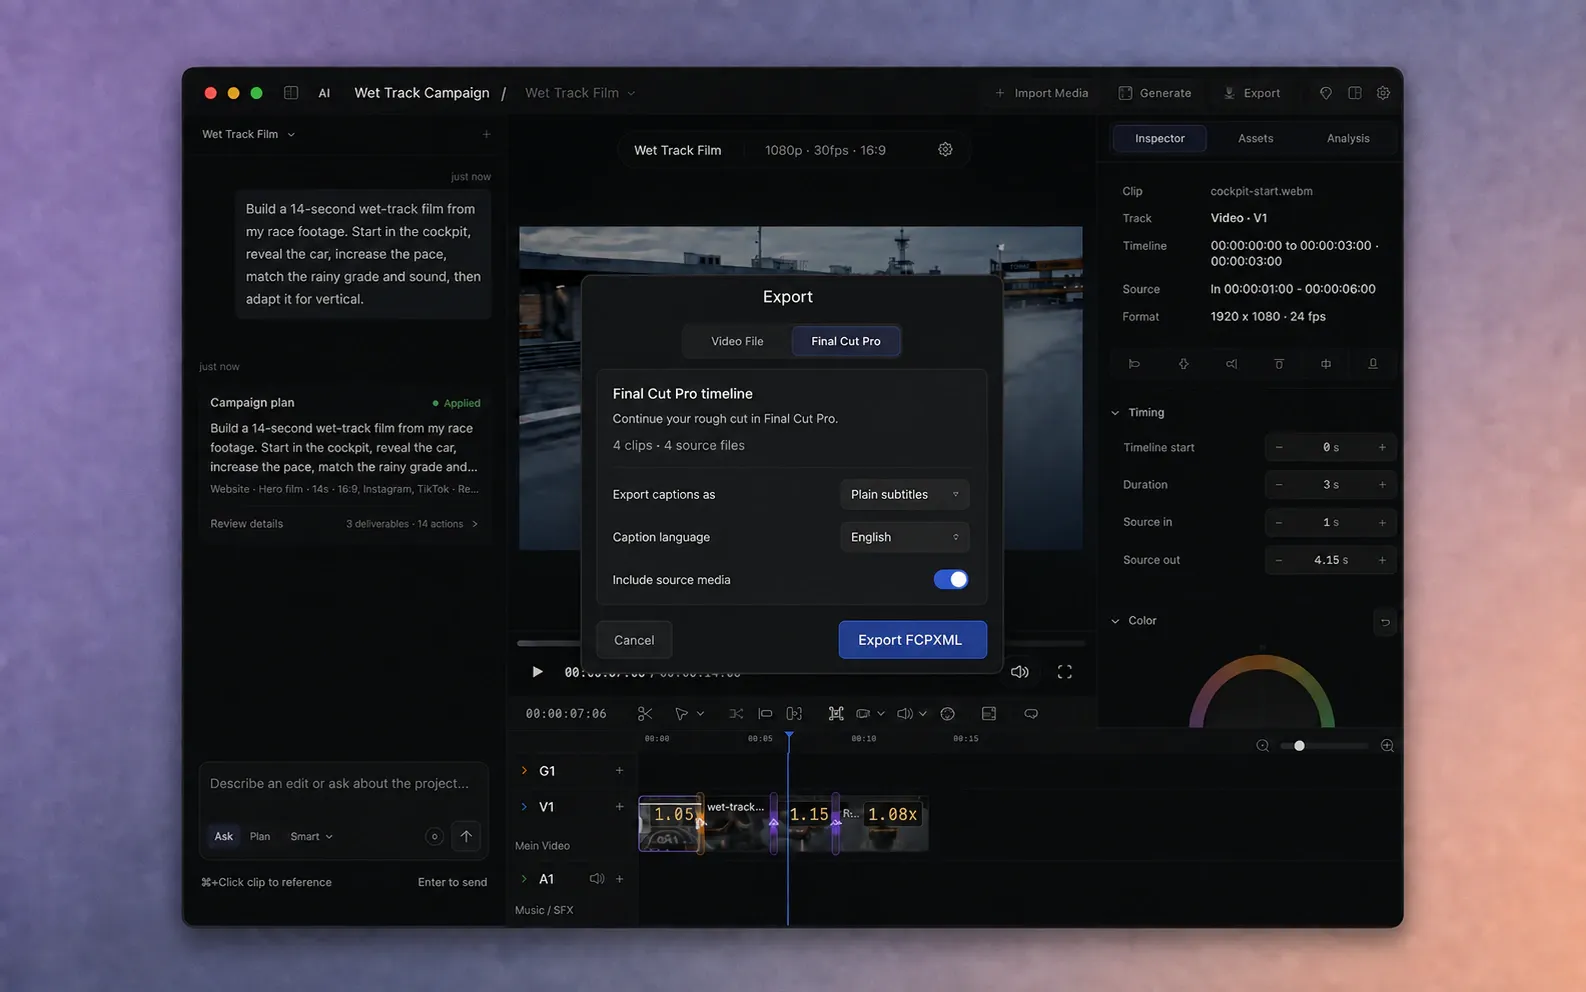
Understand what the handoff creates.
AVE 1.2.15 can export the active sequence as FCPXML, the interchange format Final Cut Pro uses to rebuild an editable timeline. This is different from rendering an MP4 or MOV. Final Cut receives supported timeline structure and continues the editing workflow with the source media.
The handoff includes clips, source trims, gaps, track placement, static clip and track audio levels, captions, and supported still images. It does not turn every AVE effect into a matching Final Cut effect. AVE checks the sequence first and tells you what will change.
Keep both applications in the workflow. Use AVE for footage search, transcript work, planning, and the rough cut. Use Final Cut Pro when its finishing, organization, effects, or delivery tools are the better fit.
Prepare the sequence in AVE.
- Open the project and make the sequence you want to transfer active.
- Play from the beginning through the final frame. Confirm the order, trims, gaps, and audio levels.
- Relink any missing source media before exporting.
- Reset retimed clips to 1×. The current FCPXML exporter does not transfer speed changes.
- Move overlapping clips to separate tracks, and make sure captions do not overlap each other.
AVE also needs a valid sequence resolution and supported frame rate. If a required condition is missing, the export panel blocks the handoff and explains what to correct.
Open the Final Cut Pro export.
- Choose Export in AVE’s top bar.
- Select Final Cut Pro instead of Video File.
- Check the clip and source-file count shown above the export options.
This panel prepares an editable FCPXML handoff. Return to Video File when you want a finished MP4 or MOV instead.
Choose how captions should arrive.
Caption options appear when the sequence contains captions:
- Plain subtitles preserve caption text and timing as editable subtitles. Choose the correct caption language. Font styling, backgrounds, positioning, animation, and word highlighting do not transfer.
- Editable titles turn captions into simple white, centered Basic Titles. You can change their font, size, color, and position in Final Cut’s title inspector.
AVE also writes an SRT copy beside the FCPXML. Treat it as an alternative. Importing the SRT after captions are already embedded in the FCPXML creates duplicates.
Decide whether to include source media.
Include source media is enabled by default. AVE copies every used source file into a Media folder beside the FCPXML. It copies the full files, not only the used ranges, so you can extend trims later in Final Cut.
Turn it off when Final Cut can continue referencing the files in their current locations. Keep those files available and do not rename or move them after export. If Final Cut cannot find them, relink the media there.
For a portable handoff, include the media. The folder will take more disk space and may take longer to create, but it is easier to move to another drive or Mac without breaking file references.
Read every compatibility change.
AVE separates blocking problems from changes that still allow an export. Fix blocking problems first. For warnings, decide whether the simpler imported timeline is acceptable, then enable Export with these changes.
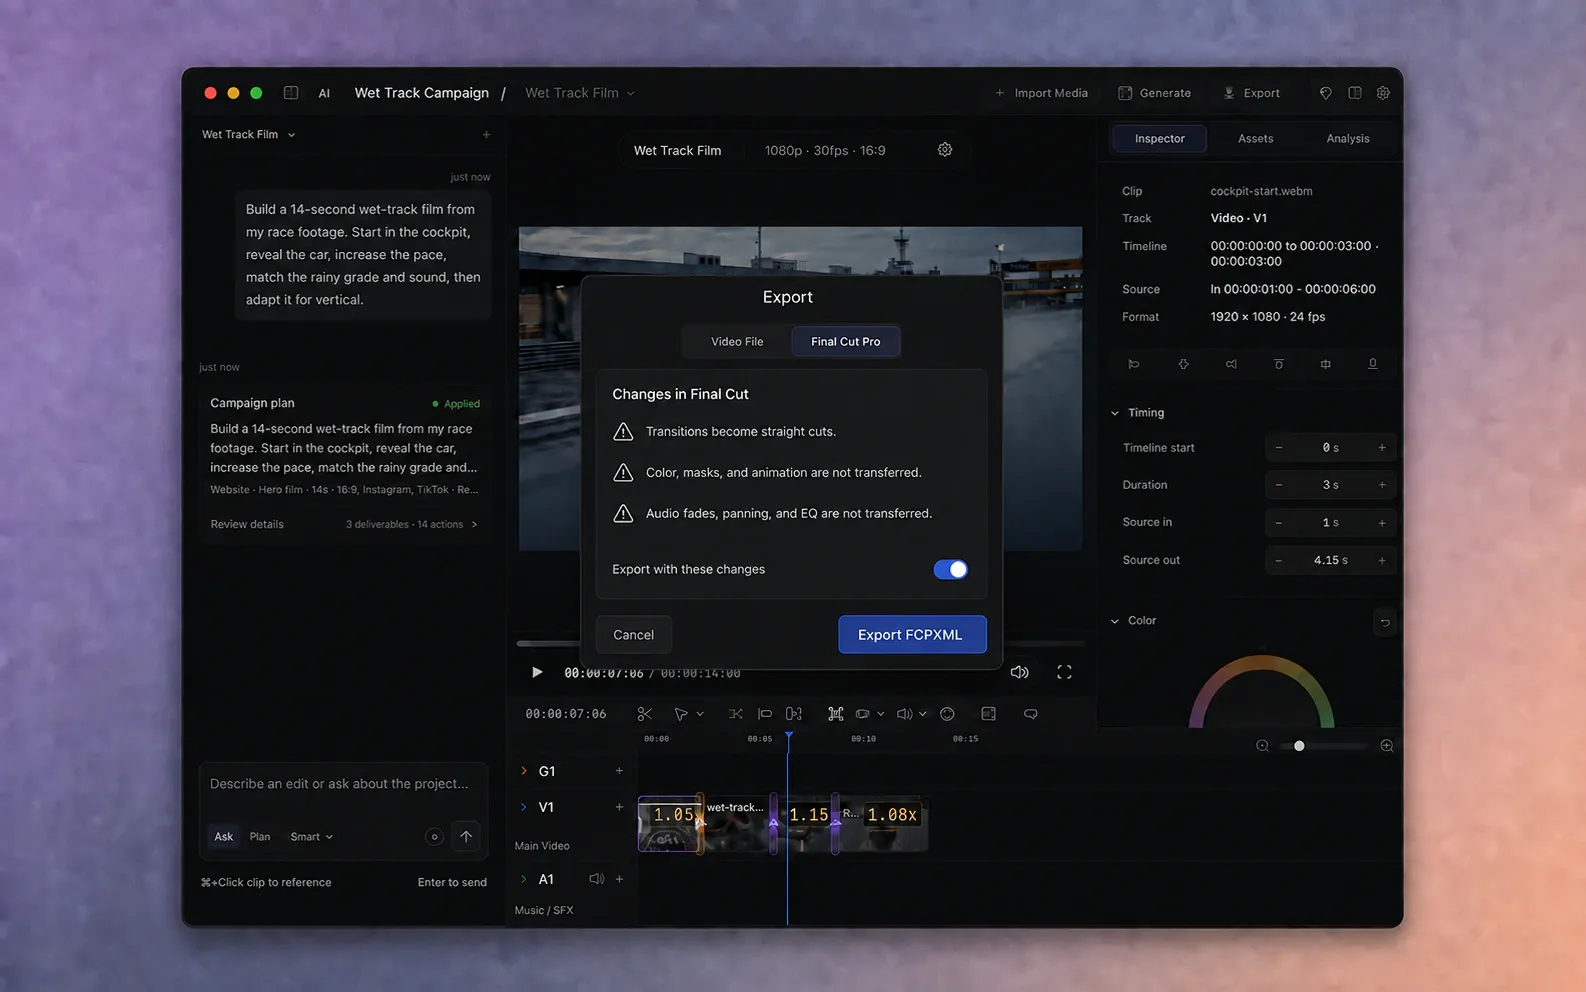
Changes AVE can report
- Transitions become straight cuts at the existing clip boundaries.
- Video transforms, color adjustments, masks, animation, and keyframes are omitted. Video uses Final Cut’s standard fit.
- Complex graphics and titles are omitted while their timeline space is preserved.
- Audio fades, panning, and EQ are omitted. Static clip and track levels remain.
- Caption appearance is simplified according to the caption option you selected.
- Image animation and unsupported image effects are omitted. Supported static placement, size, rotation, and opacity remain.
- A non-black sequence background becomes black, and the exported sequence uses Rec. 709.
Create the FCPXML handoff.
- Resolve errors and review any compatibility warnings.
- Enable Export with these changes when warnings are present and acceptable.
- Choose Export FCPXML, select the destination, and wait while AVE checks and optionally copies the media.
- When AVE reports that the export is saved, choose Reveal in Finder.
The finished folder contains the FCPXML, an SRT caption copy when captions exist, Export notes, and a Media folder when source copying is enabled. Read Export notes before moving into Final Cut.
Import the timeline into Final Cut Pro.
- Open Final Cut Pro.
- Choose File → Import → XML.
- Select the .fcpxml file inside the AVE export folder, then choose Import.
- Let Final Cut create the corresponding clips, event, project, and library structure described by the XML.
Apple also supports importing an XML file by double-clicking it in Finder or dragging it onto the Final Cut Pro app icon. See Apple’s official XML transfer guide for the current Final Cut instructions.
Verify the imported timeline before finishing.
- Check the project resolution, frame rate, duration, and Rec. 709 color setting.
- Compare the opening, ending, every cut, and every intentional gap with the AVE sequence.
- Check track placement and listen to the static clip and track audio levels.
- Review subtitles or titles for timing, language, line breaks, and appearance.
- Inspect still-image framing and rebuild any transition, color work, animation, mask, graphic, or audio processing listed in Export notes.
Keep the AVE project until the Final Cut handoff is approved. The two timelines are separate after export, so later changes in one do not update the other automatically.
Fix common handoff problems.
AVE asks you to relink media
The source file is missing from its expected location. Relink it in AVE and run the export again.
A source format cannot be exported
Convert the source to MOV or MP4 with H.264 or ProRes video and AAC or PCM audio. Use WAV for audio-only media, then relink the converted file in AVE.
AVE blocks a speed change or overlap
Reset the clip to 1× speed. Put overlapping clips on separate tracks and separate overlapping captions before exporting again.
Final Cut shows missing media
Relink Final Cut to the original files or the Media folder AVE created. For the next handoff, keep Include source media enabled.
The imported result looks different
Compare the timeline with Export notes and AVE’s compatibility list. Rebuild the omitted finishing work in Final Cut. If the import itself fails, send your AVE version, macOS and Final Cut versions, the exact error, and a safe reproduction to support@tinythings.app. Do not send confidential footage unless it is necessary and you have permission.