How to frame and blend videos in AVE.
Give imported videos an editable background and frame, combine layers with blend modes, and find the controls in AVE’s categorized Inspector.
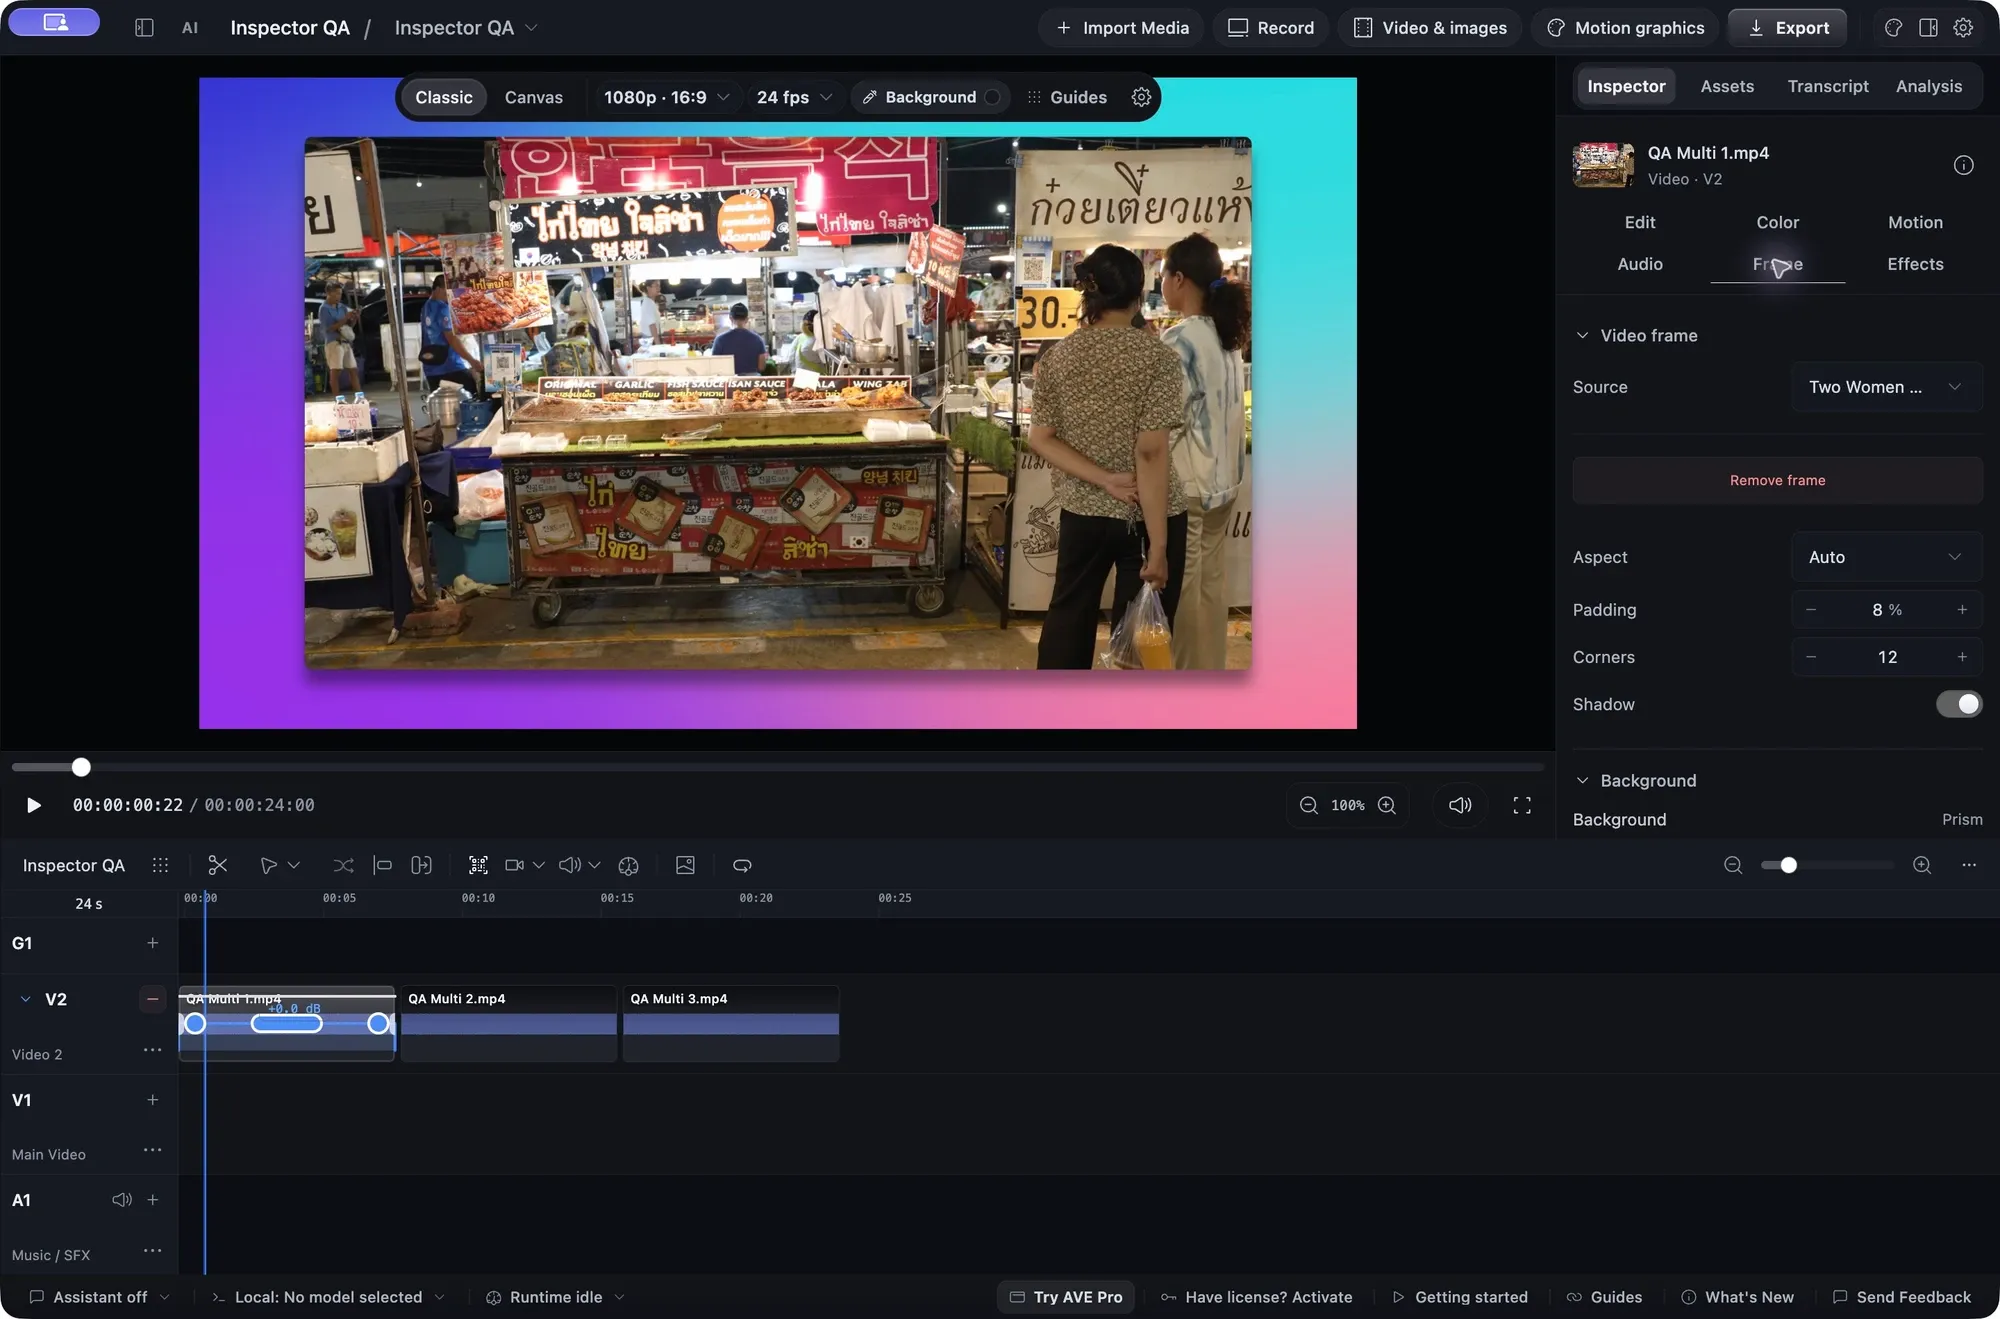
Start with a clip on the timeline.
Import a video, add it to your sequence, and select its timeline clip. Open Inspector. Its categories separate Edit, Color, Motion, Audio, Frame, and Effects; the Info button shows clip details. Video framing requires macOS 15 or later.
Add a background and frame.
- Open Frame and choose Frame video.
- Keep the mesh background or choose Solid, Gradient, or Image.
- Adjust Padding, Corners, and Shadow. Auto uses the sequence or layout cell’s proportions while keeping the footage in proportion.
Use Edit for crop, Motion for manual zooms, and Effects for privacy masks. Drag numeric fields horizontally or type precise values. Cursor effects, automatic click zooms, and camera moments require captured recording data; importing an ordinary video does not create that data.
Choose Remove frame to return to the unframed clip. Your original source file stays unchanged.
Combine overlapping layers.
Place video or graphics above another visible clip. V2 appears above V1. Select the upper clip, open Effects, and choose Normal, Multiply, Screen blend, Overlay, Darken, or Lighten from Blend mode.
In Edit, adjust Opacity with the slider or enter an exact percentage. Scrub an overlapping range to judge the combination. The track’s ellipsis menu switches all its video clips between thumbnails and editable waveforms when you need to work on their audio.
Check the finished sequence.
Play through the framing, overlap, zooms, and masks. These blend modes work in preview and native video export. FCPXML does not preserve AVE’s framed or blended finish; use a rendered video when that appearance must stay intact. Choose Export, review preflight, render locally, then open the finished file to check picture and sound.